Dies ist eine alte Version des Dokuments!
Versand vom Prep Center an FBA
Die Versandart Transit to FBA benachrichtigt das Prep Center, dass die Waren nach Ankunft im Prep Center an Amazon gesendet werden. Das Prep Center muss also die Ware annehmen und unverzüglich an den Spediteur weiterleiten.
So erstellen Sie die Sendung Transit an FBA
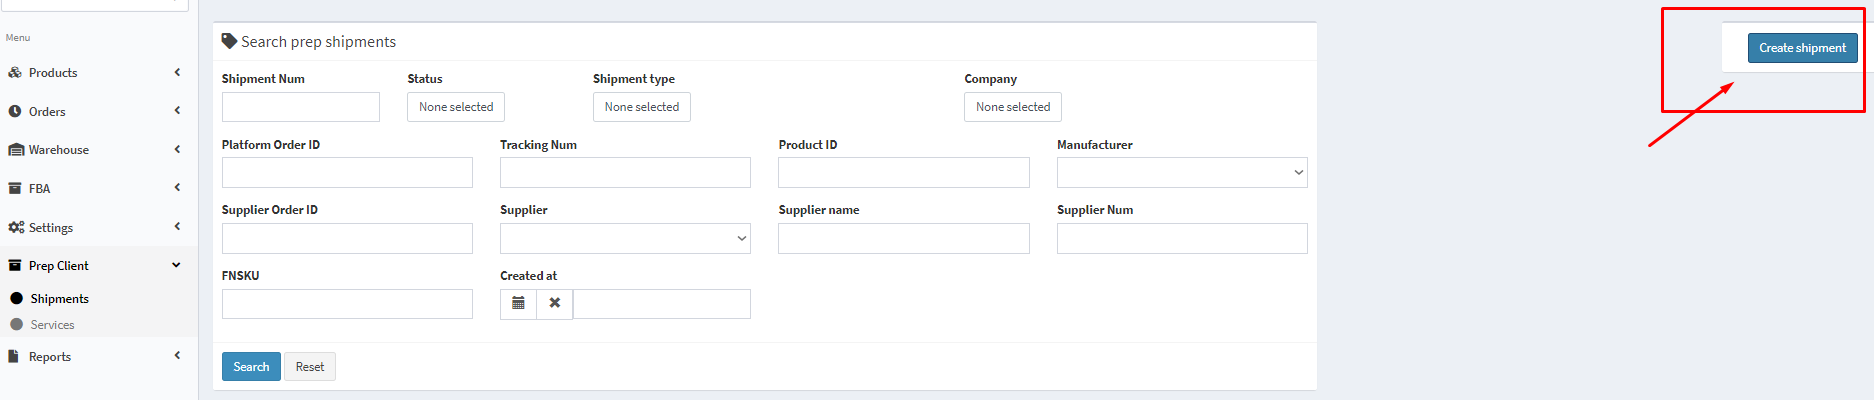
1. Gehen Sie auf Prep Client-Shipments und klicken Sie auf Create shipment. Wählen Sie die Sendungsart Transit to FBA from Prep.

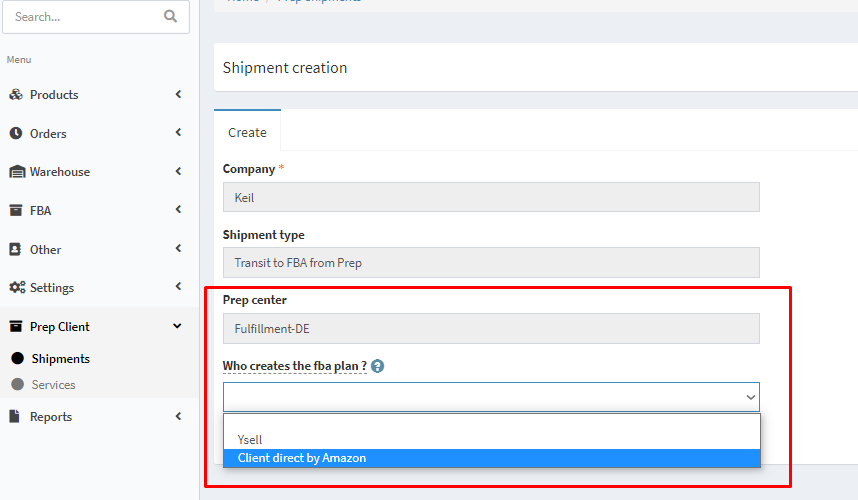
2. Geben Sie an, welches Prep Center die Sendung bearbeiten soll. Im Feld Who Creates the FBA plan? geben Sie an, ob der FBA-plan von Ysell oder von Amazon erstellt wird.
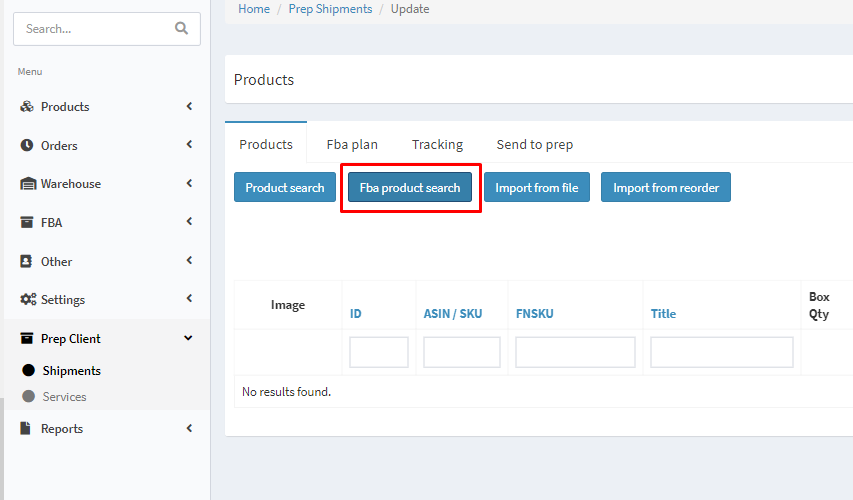
3. Suchen Sie nach einem Produkt anhand seiner SKU/FNSKU/ASIN, indem Sie in der erstellten Sendung auf FBA Product Search klicken.
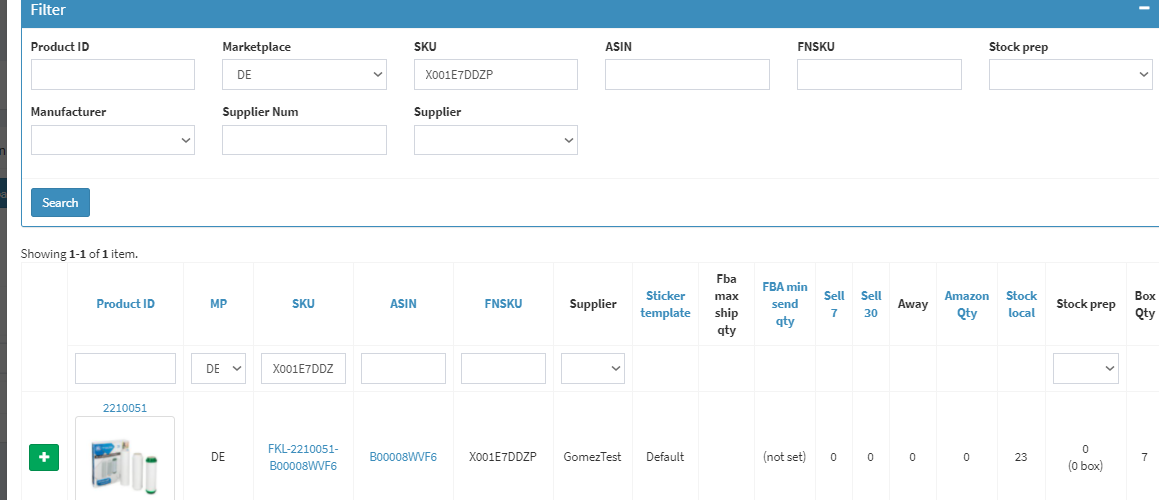
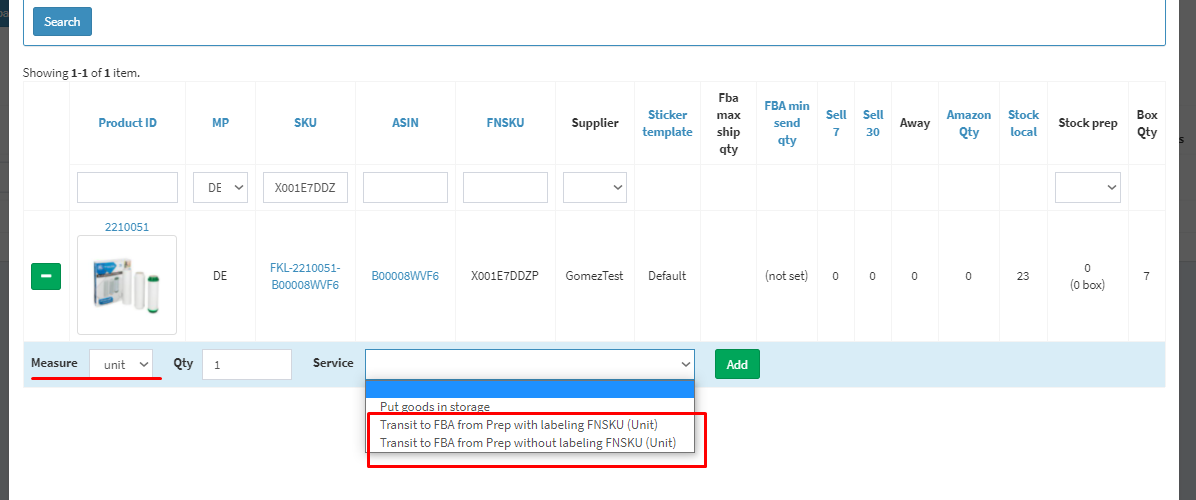
4. Fügen Sie die Ware der Sendung hinzu. Sie können die Waren in Einheiten oder Kartons hinzufügen. Beim Hinzufügen von Waren in Einheiten bietet das System den Service an, Waren auf dem Transportweg mit oder ohne FNSKU-Kennzeichnung zu versenden. Das Hinzufügen von Waren in Kartons ist möglich, wenn die Waren eine bestimmte Masterbox-Abmessung in der Produktkarte haben. Wenn Sie die Waren in Kartons hinzufügen, bietet das System einen Transportservice über die Masterbox an.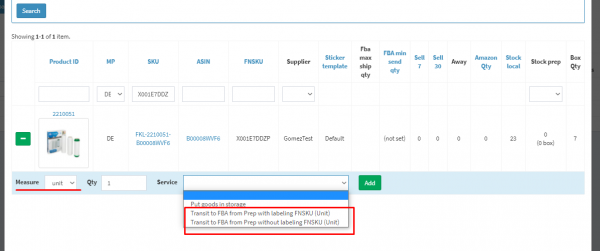

5. Erstellen Sie auf FBA plan einen neuen FBA-Plan für die Sendung.

6. Klicken Sie auf Create shipments, um eine neue FBA-Sendung zu erstellen.

7. In the tab FBA plan, the information about the created FBA shipment has appeared - its name, Shipment ID on Amazon, the city in which the shipment will arrive, as well as the status of the shipment on Amazon. By clicking on Amazon you will open the created shipment in Seller Central. By clicking on Delete you delete the information about the FBA plan.

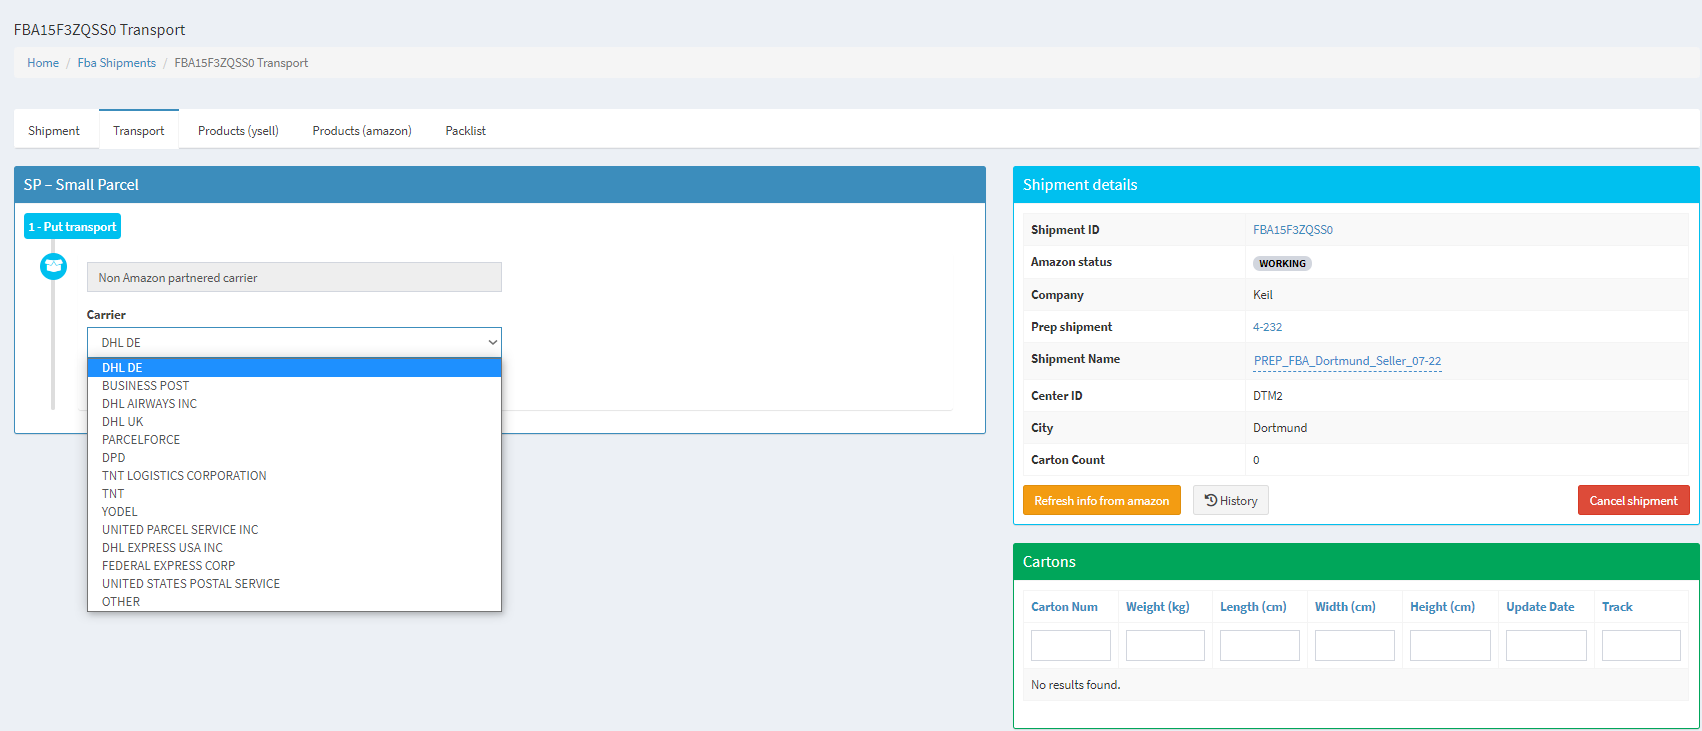
8. Specify the information about the weight and the specifications of the box with goods. After clicking on Next, specify whether the shipment is to be carried out via Amazon Partnered Carrier program, and select a carrier.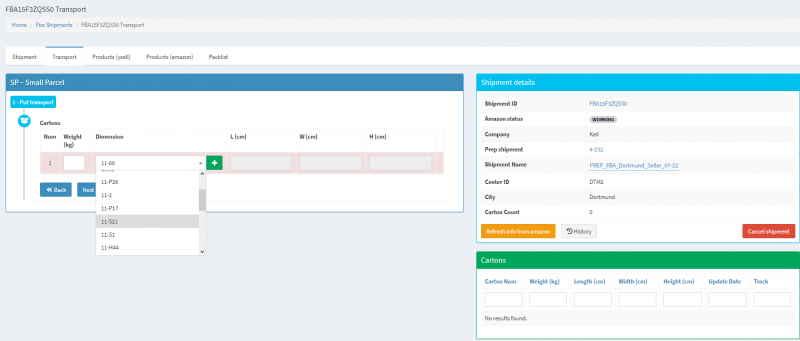

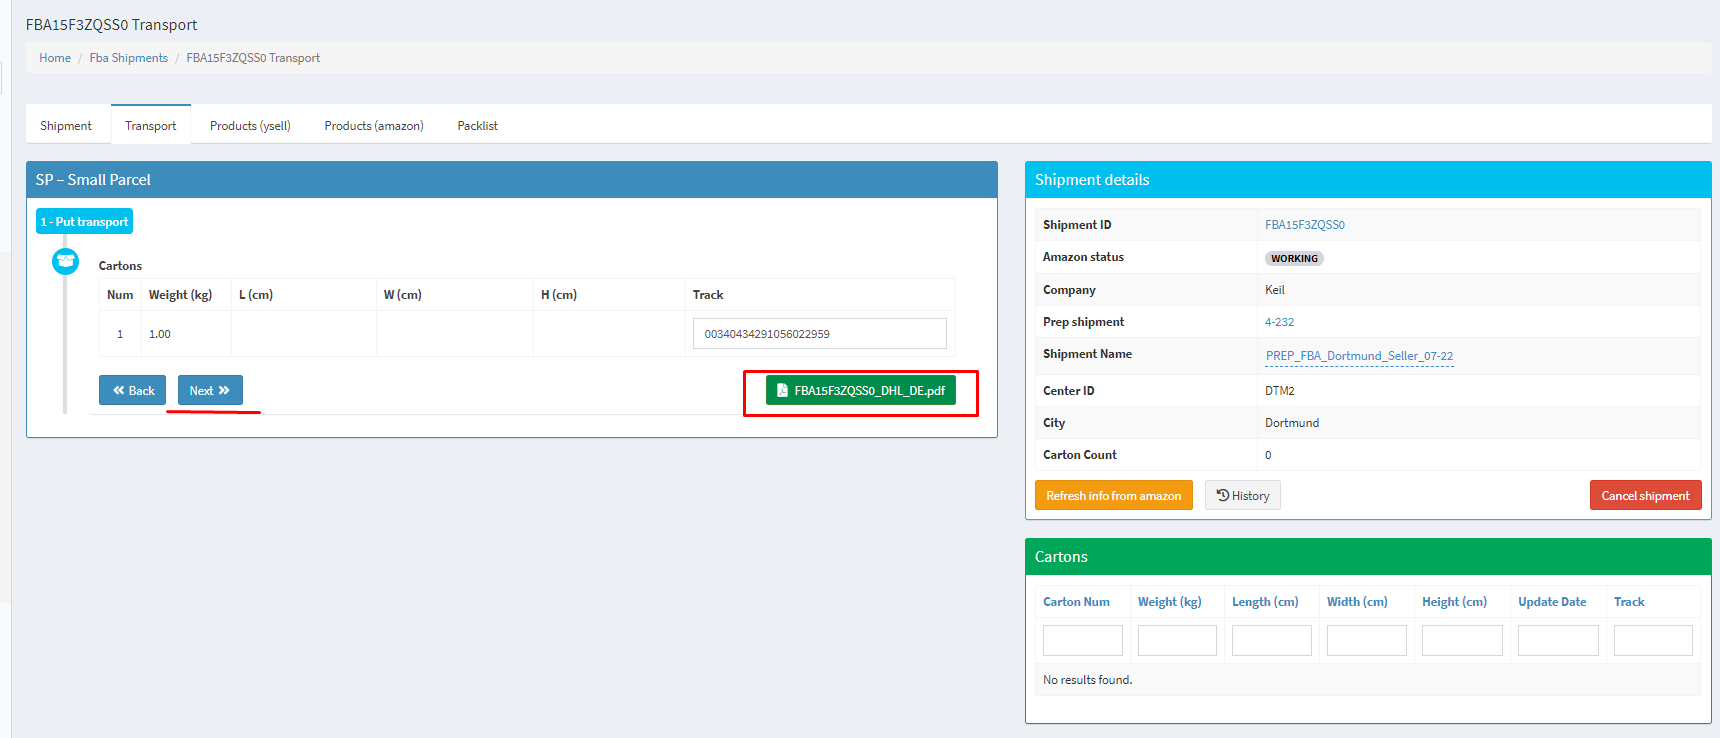
9. Print the labels for shipping. Click on Next in order to submit the shipment information to Amazon.
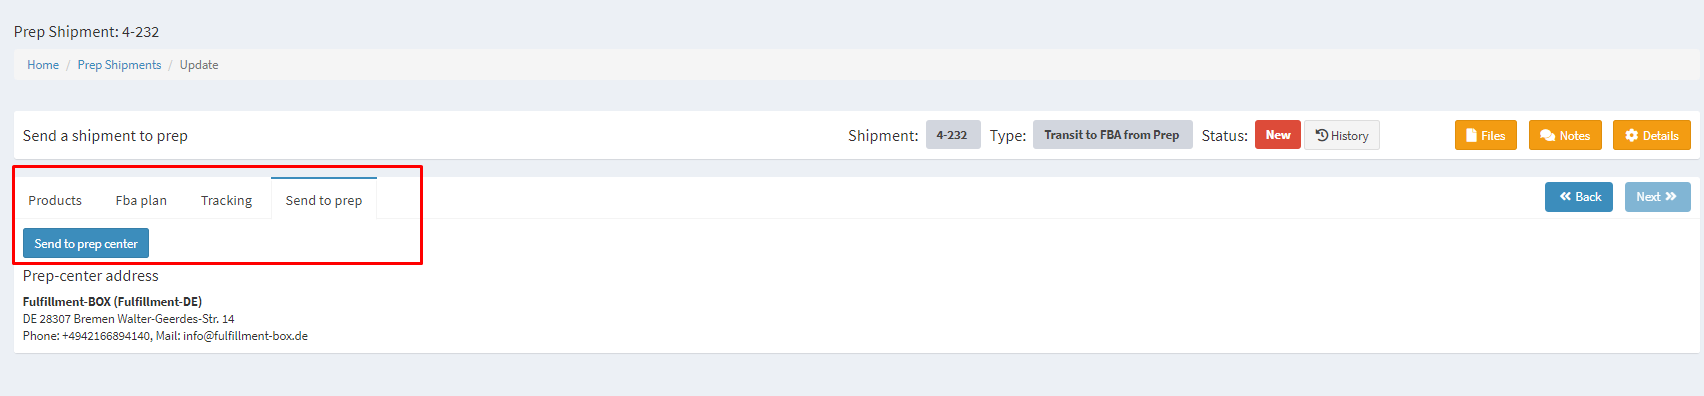
10. Send the goods to the Prep Center by clicking on Send to Prep.
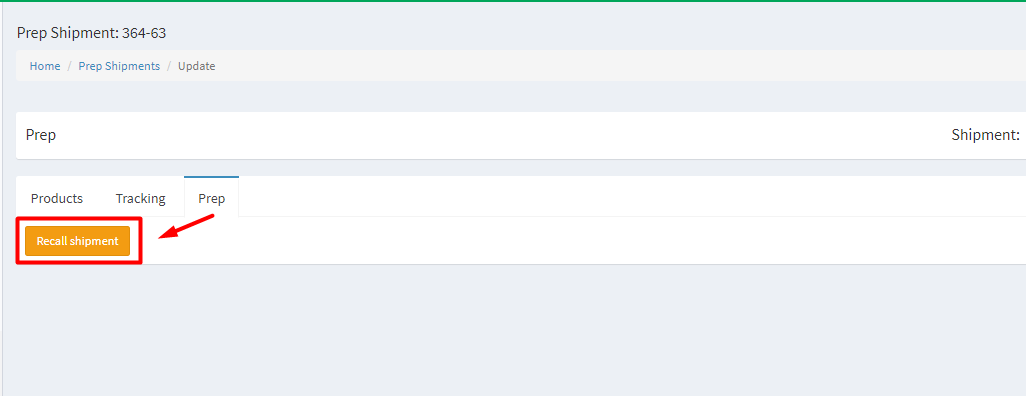
11. If you would like to make changes in the shipment after sending to the Prep Center, you need to recall the shipment first. In order to do it, open the tab Prep in the shipment and click on the button Recall Shipment (available only from the status Transfer). After that you can make changes in the shipment and send it again to the Prep Center.