This is an old revision of the document!
Start working with Ysell.pro software system
Welcome to Ysell system! Ysell allows to achieve automatic work with the Prep center. You need to set initial settings to use it efficiently.
1. Getting the access to Ysell features
Apply a request for creating a new Prep center account https://ysell.pro/
2. Entering payment details and address of the Prep center
Indicate the address of the Prep center, it’s necessary to get the access to full functionality of Ysell system. The address you indicate will be used for invoice creation, packing list generation and also it’ll be used by clients for creating shipments to the warehouse.
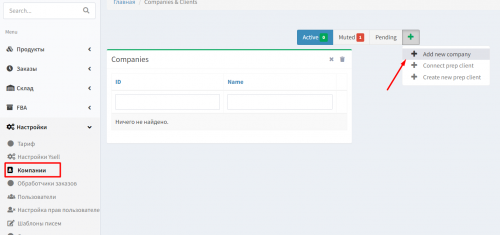
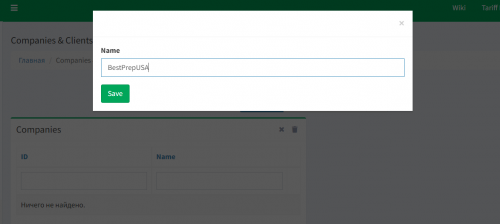
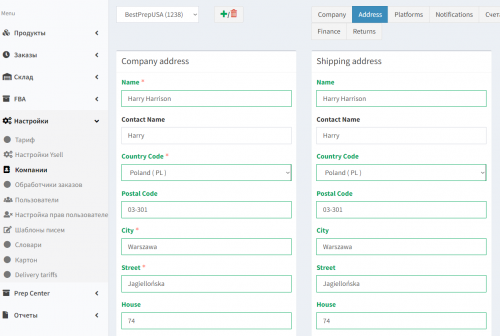
1. Go to Menu - Settings and go to Companies. Select Add new company after clicking the “+” button. Enter the name of your Prep center.
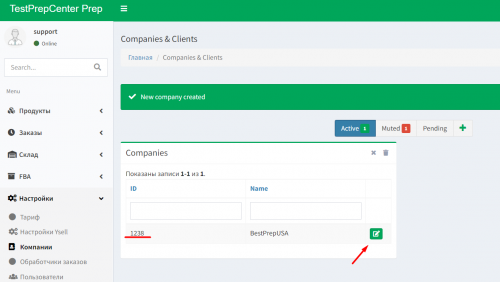
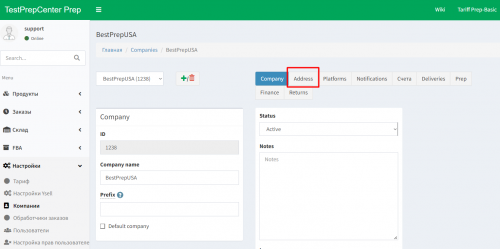
2. System will inform you about creating a new company. All companies get their own IDs. Go to editing information of the company by clicking the Pencil icon. Go to the Address tab.
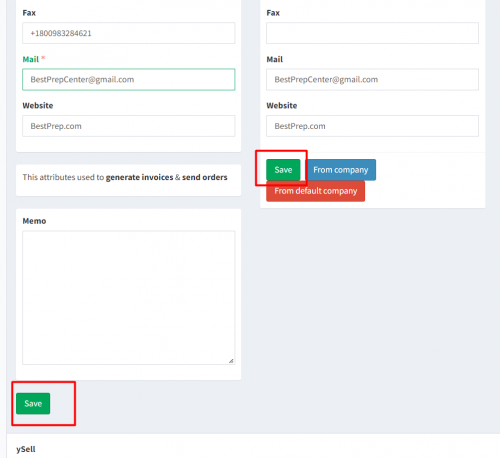
3. Fill the legal address of the company in the Company address fields. Enter the actual address of the company in the Shipping address fields.Save entered information.
Adding stocking places
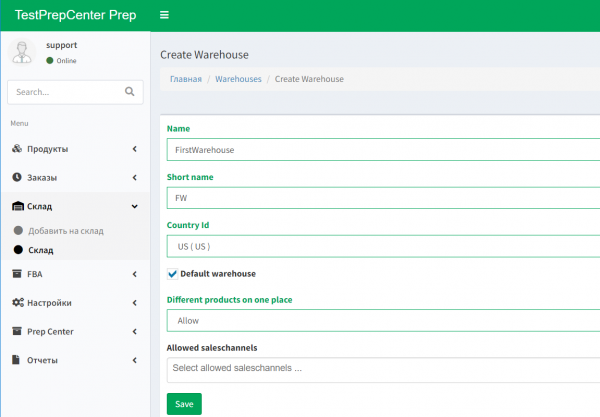
Put the information about stocking places. Clicking Warehouse in the menu select the Warehouse tab. Click Create warehouse and indicate the information about the warehouse.
Name - Name of the warehouse.
Short name - Acronym of the warehouse.
Country Id - Country of the warehouse.
Default warehouse - Ticking box for indicating the warehouse as default.
Different products on one place - Indicate Allow for opportunity of stocking different SKUs.
Allowed saleschannels - Available saleschannels for the warehouse. If none was selected then all is available.
Click Save
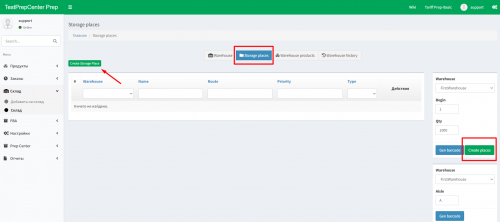
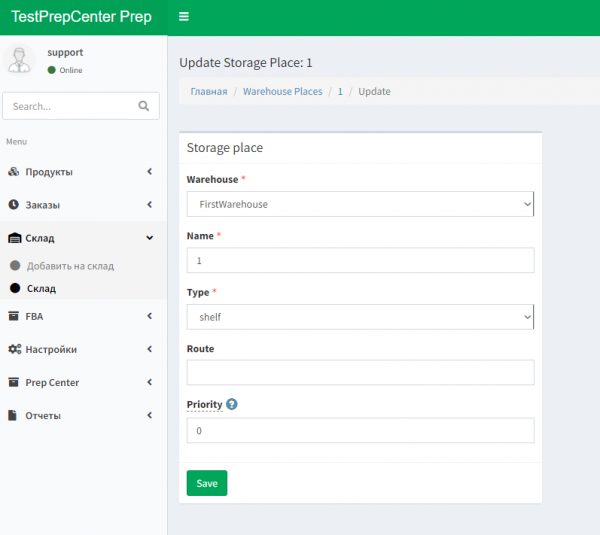
Move on to adding stockplaces. You can add stockplaces one at a time by clicking Create Storage Place and given amount at a time (Begin - it's the first number, Qty - quantity of storage places that will be created). By clicking the pencil icon go to information editing of the stocking place.
Warehouse - Select one of the previous created warehouses.
Name - Indicate the name of the stocking place.
Type - Type of the stocking place. It may be shelf or pallet.
Route - Route to the stocking place. For instance if specify the priority for shelf with number 2 instead of 5 and for another one specify with number 1 instead of 4, then route will be paved 2-1.
Priority - Specify the priority of the stocking place. If the product is in several stocking places then priority of taking it off will be with the higher priority.
Click Save
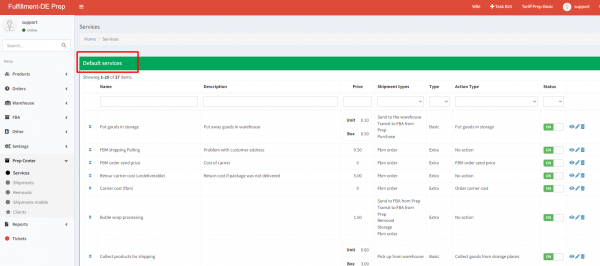
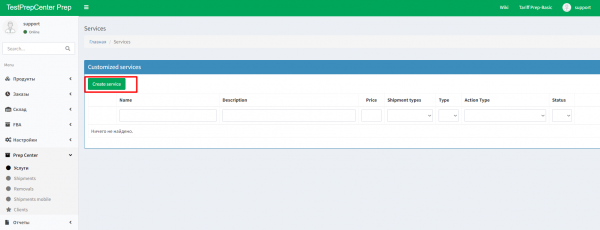
3. Services
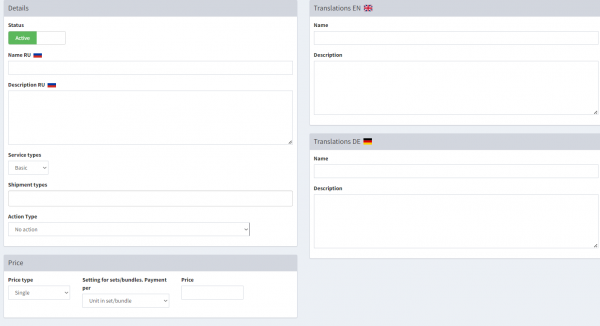
Status - Ползунок в статусе Active указывает, что услуга активна. Inactive - не активна.
Name RU - Укажите описание услуги на русском языке
Description RU - Описание услуги.
Shipment types - Типы отправок, которым применима услуга.
Action Type - Действие, которое применяется по услуге.
Price - В блоке указывается цена за услугу. Price type - используйте single для указания фиксированной цены услуги. Scale - для шкалирования цены в зависимости от объема.
Setting for sets/bundles. Payment per - параметр, отвечающий расчет цены для сетов, или единичных товаров.
Price - цена услуги. Валюта, в которой ведется расчет, указывается в настройках преп центра.
Нажатием на Save сохраните введенную информацию
Дополнительная информация по созданию услуг
4. Создание клиентского аккаунта из преп центра
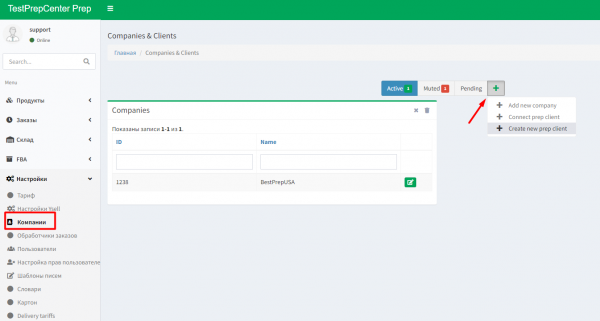
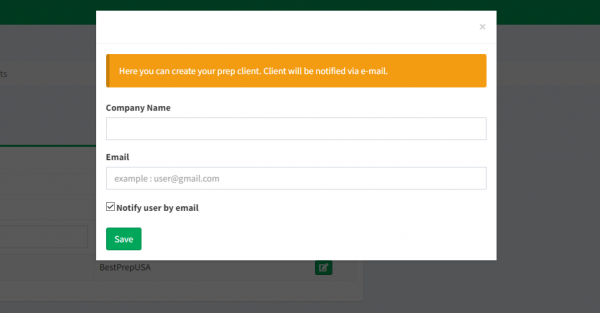
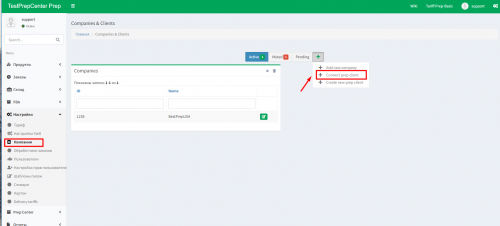
Вы можете самостоятельно создавать для клиентов аккаунты в Ysell. Для создания аккаунта ysell для клиента перейдите в раздел “Настройки”-“Компании”. После нажатия на иконку карандаша, выберите функцию “Create new prep client”Укажите адрес электронной почты, название компании. Активный чек-бокс Notify user by email оповестит клиента по создании учетной записи по адресу электронной почты.
Дополнительная информация о создании клиентского аккаунта ysell со стороны Преп центра.
