This is an old revision of the document!
Creating Master-box labels
- For acceptance into the warehouse, the goods must be properly marked. If requested marking is absent, it would take longer to identify the goods.
- If printing is not available, it means that the amout in Masterbox is not indicated on the item card.
Step-by-step instruction for creating Master-box labels
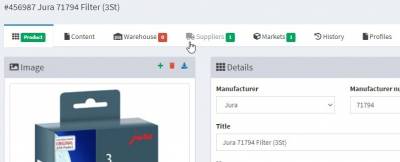
1. To form Master-box labels go to the product card.
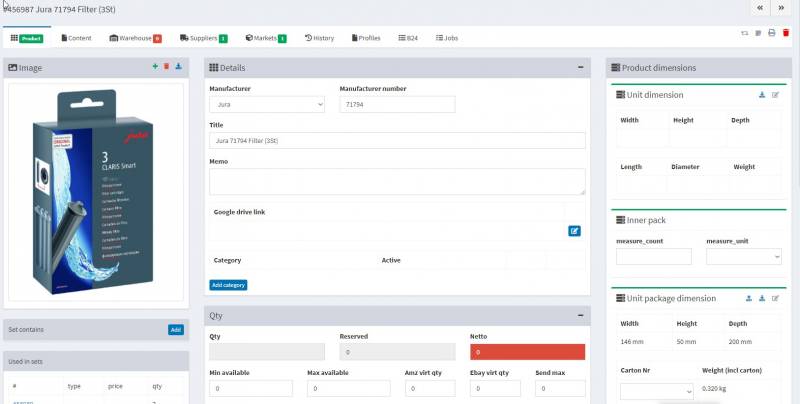

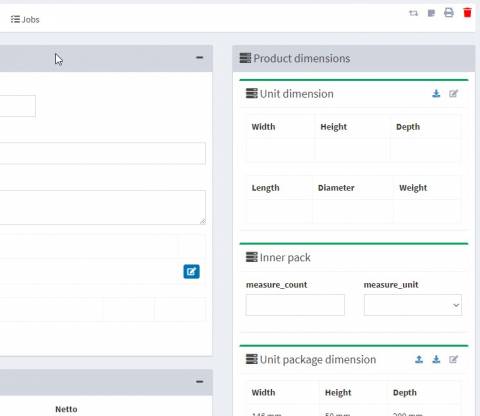
2. In the “Product dimension” window provide information about the dimensions of the product.

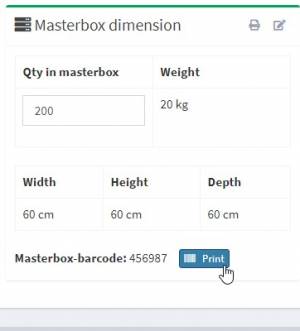
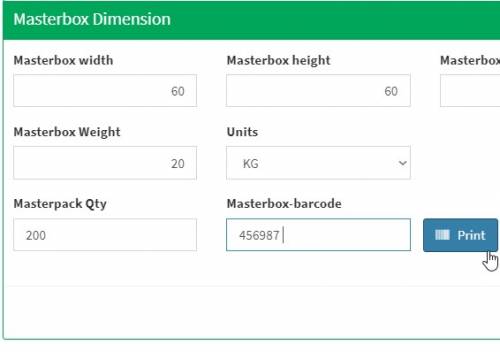
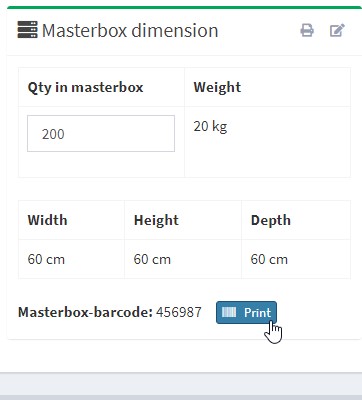
3. In the “Masterbox dimension” field you can specify how many items are included in the Masterbox, their weight, height, depth and width of the box in units of measurement. Masterbox barcode allows Prep Center to determine what kind of product it is and how much of it is in the box. By default, barcode uses the Product ID “blank” its amount in the box. You can define your own barcode by changing the data in the field and saving the changes you made.

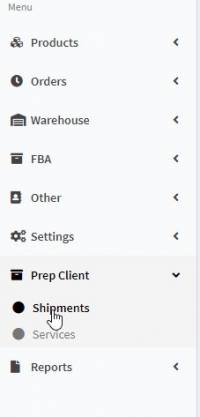
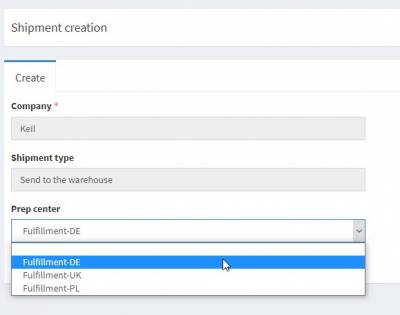
4. Go to the Prep Client - Shipments page. Form a dispatch of this product to the warehouse. Create a new shipment.


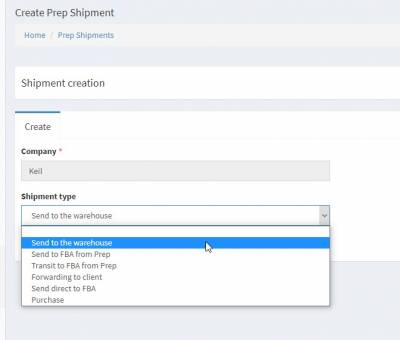
5. Indicate the name of the company and the service (in this case, sending the product to the warehouse). Select the needed Prep center.


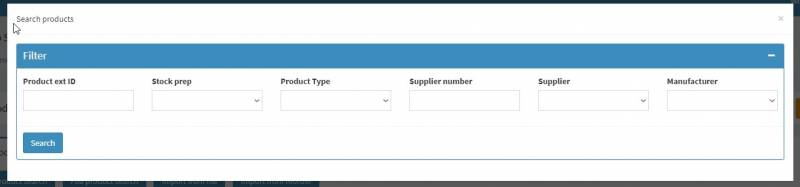
6. In the window of the created Shipment search for the product by using the “Product search” function. In the window that appears you can search for a product by ID or other known parameters).

7. When adding an item to a box shipment the system will form a position based on the number of items in a box. Adding a product in units will create an item in the specified quantity.
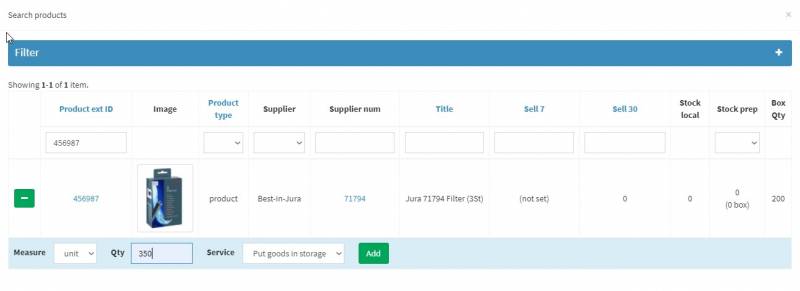

8. Re-adding items to the shipment will create a separate item. When adding Master-box to a shipment indicate the number of boxes with the product!

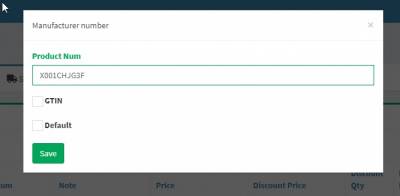
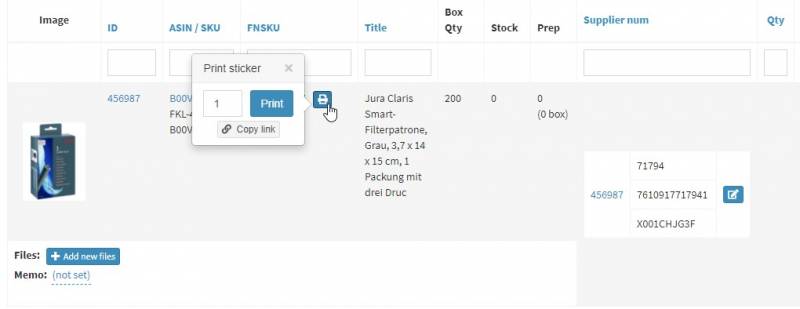
9. It is necessary to enter information about the GTIN and/or FNSKU of the product into the system. Go to the “Suppliers” tab. In the line “Manufacturer numbers”, specify the GTIN and/or FNSKU of the product, indicating to use it “by default”.


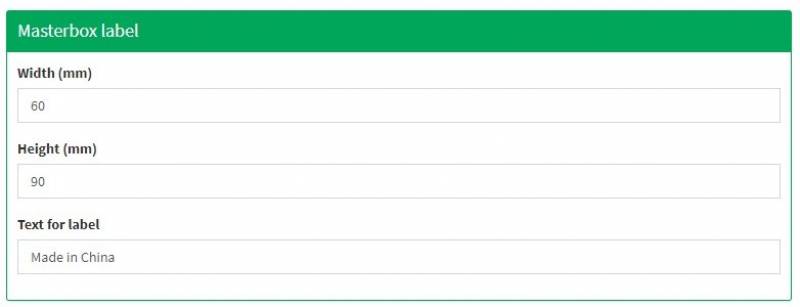
10. You may need to change the label format for a specific supplier. Go to the Products - Suppliers section, find the supplier of the product, and click on the edit icon. In the window that appears, go to the line Masterbox label. Specify the required parameters for the sticker (height, width, and text for the label).

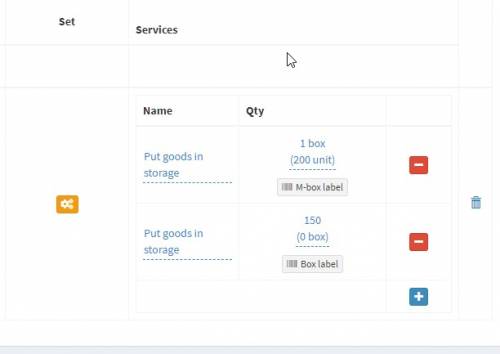
11. Now, in the created post print out the Masterbox labels. To do this, select the “Actions” - “M-box lables” function in the “Qty” column and specify the information that will be printed on the sticker (this can be the GTIN, FNSKU of the product, etc.) After clicking on “print”, you can look at what the resulting sticker looks like.
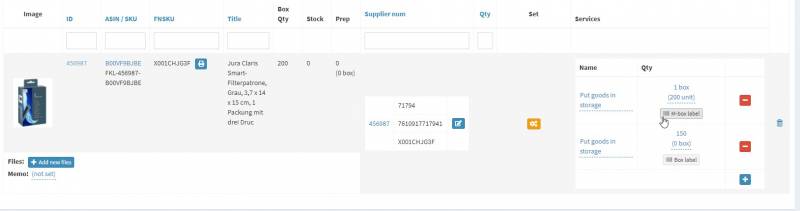

12. You can print the FNSKU product sticker by selecting the printer icon to the right of the product FNSKU information line.

13. It is possible to download the shipping information in xls format for transmission to the supplier. To do this click on “export shipment” from the shipment page.

