This is an old revision of the document!
Start working with Ysell.pro software system
Welcome to Ysell system! Ysell allows to achieve automatic work with the Prep center. You need to set initial settings to use it efficiently.
1. Getting the access to Ysell features
Apply a request for creating a new Prep center account https://ysell.pro/
2. Entering payment details and address of the Prep center
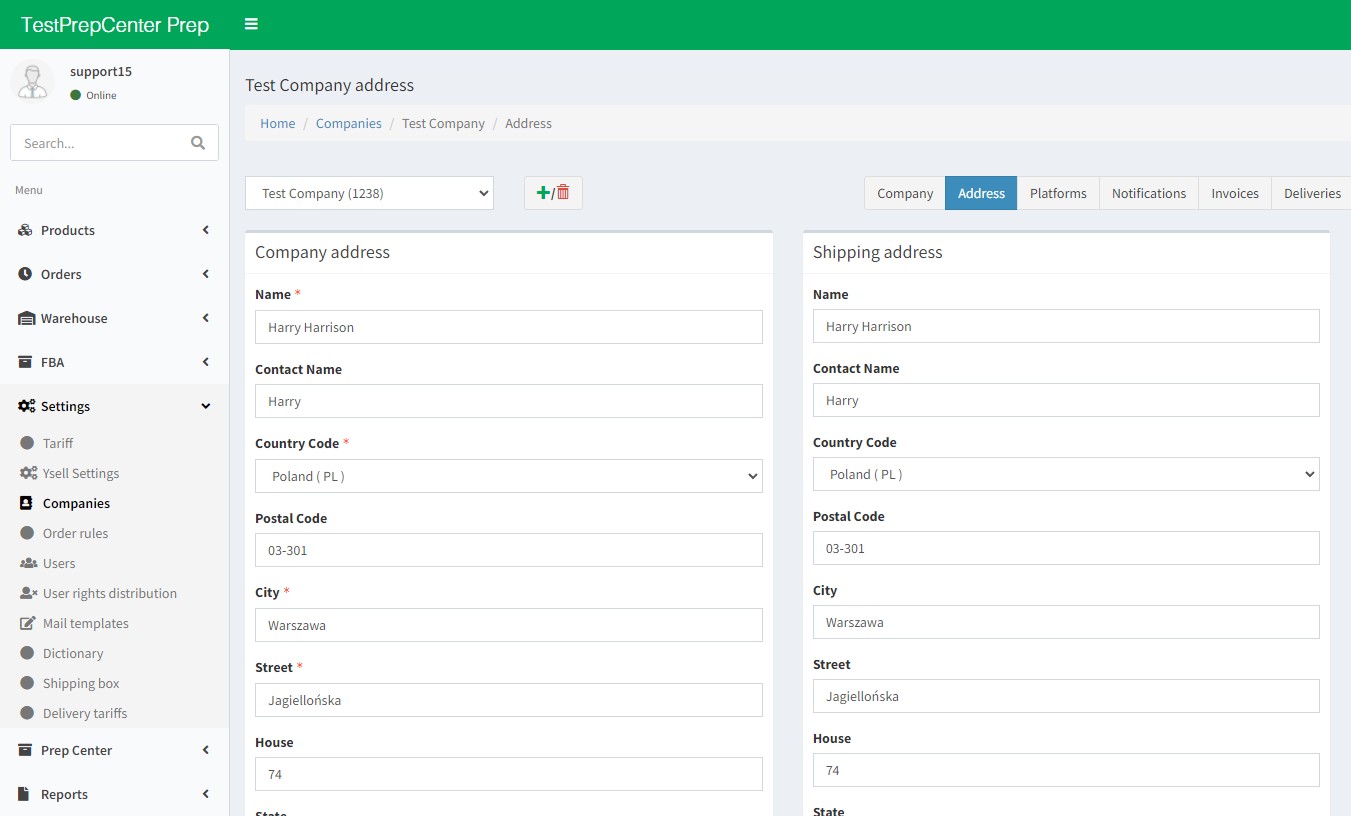
Indicate the address of the Prep center, it’s necessary to get the access to full functionality of Ysell system. The address you indicate will be used for invoice creation, packing list generation and also it’ll be used by clients for creating shipments to the warehouse.
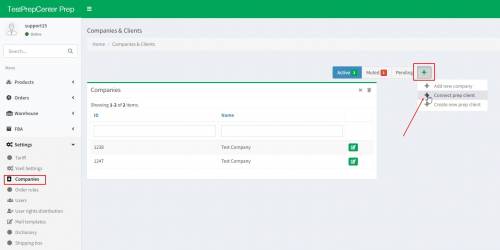
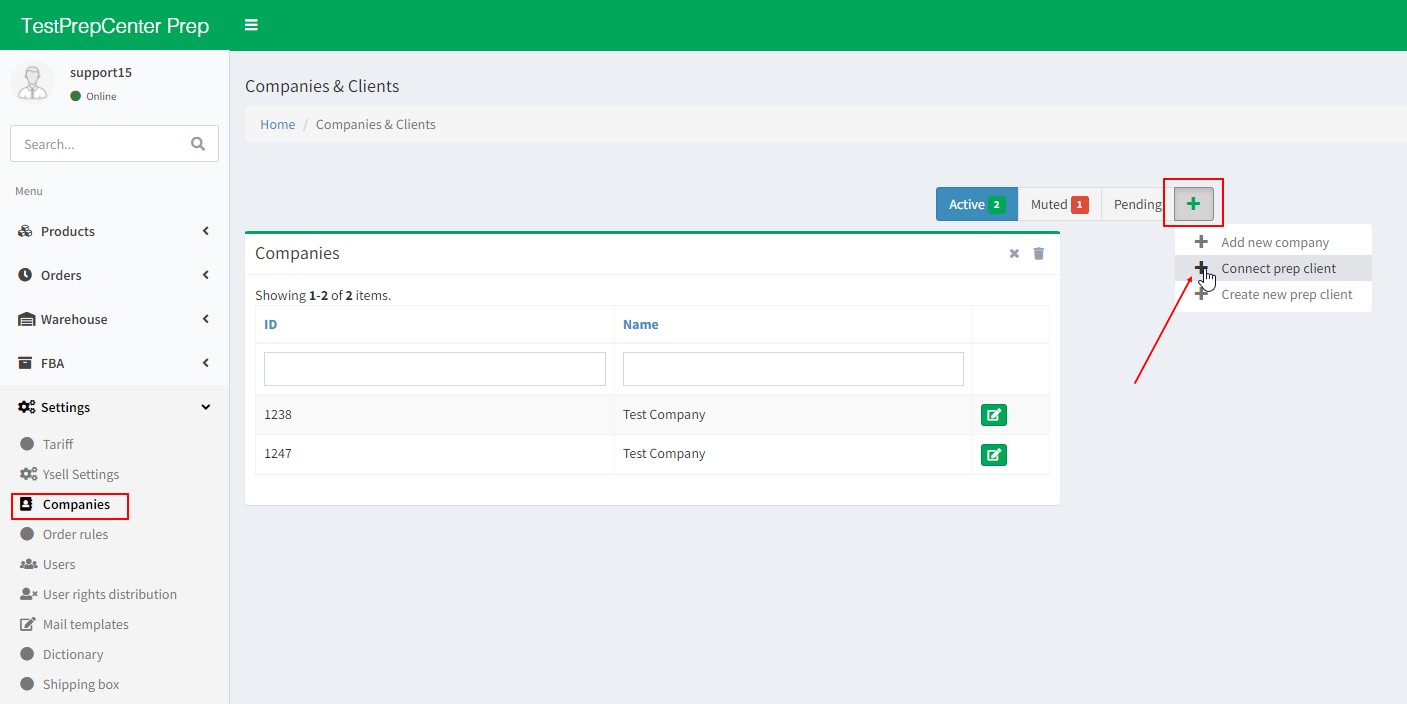
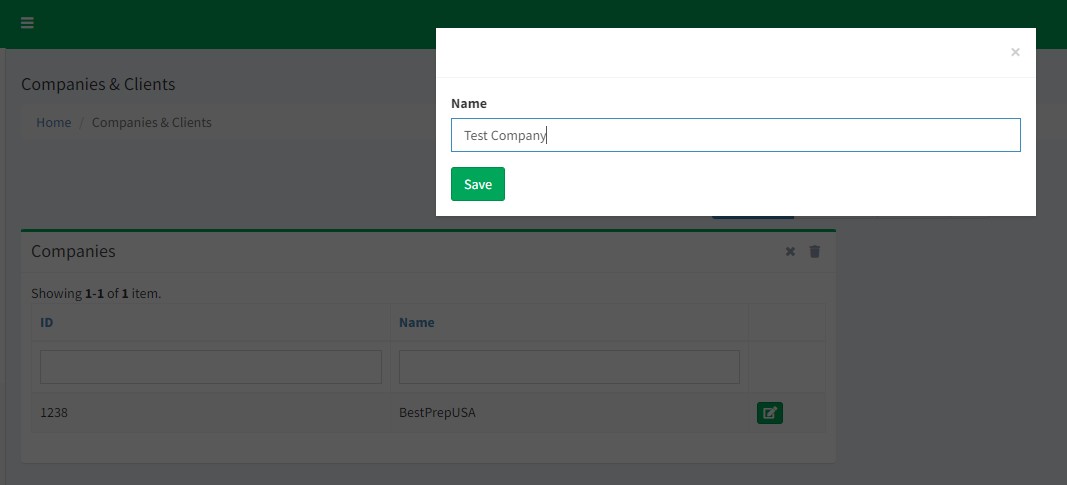
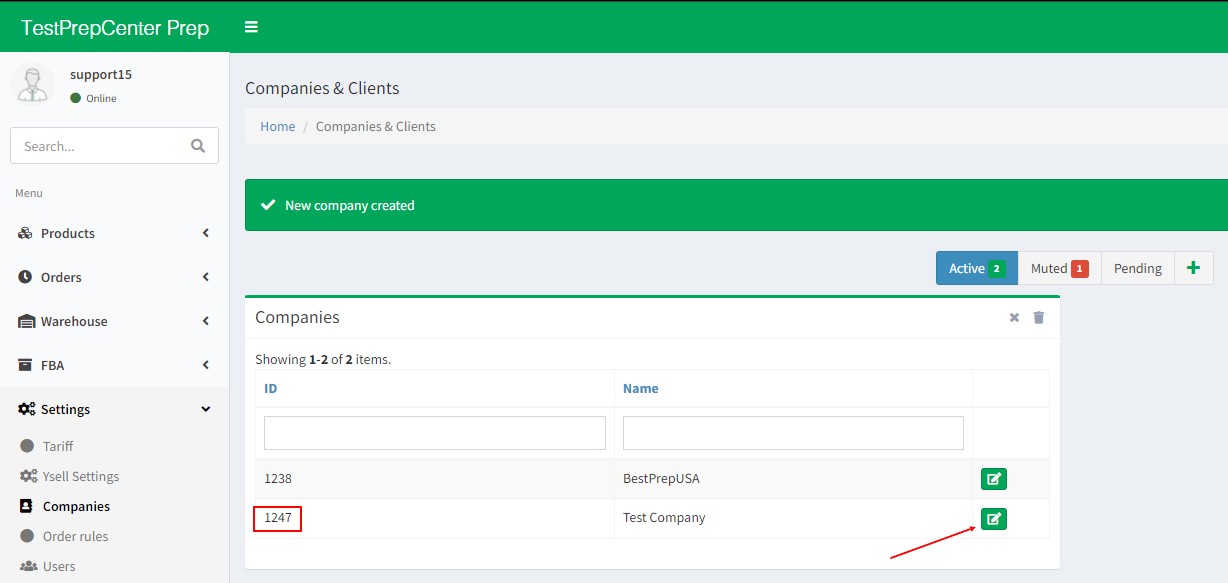
1. Go to Menu - Settings and go to Companies. Select Add new company after clicking the “+” button. Enter the name of your Prep center.
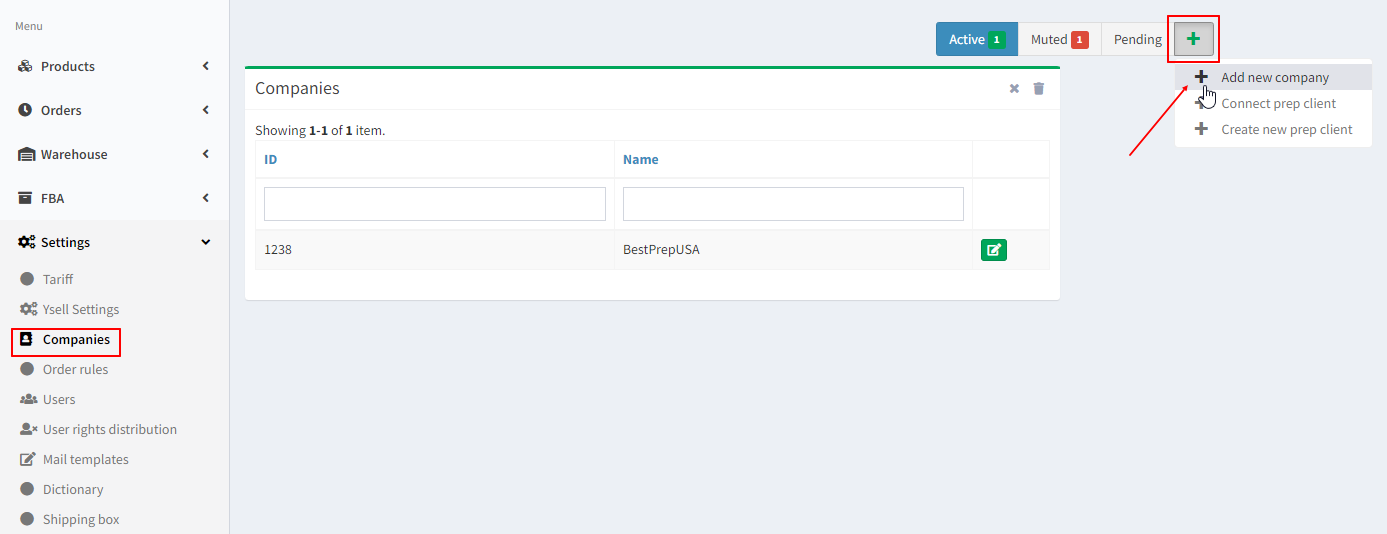
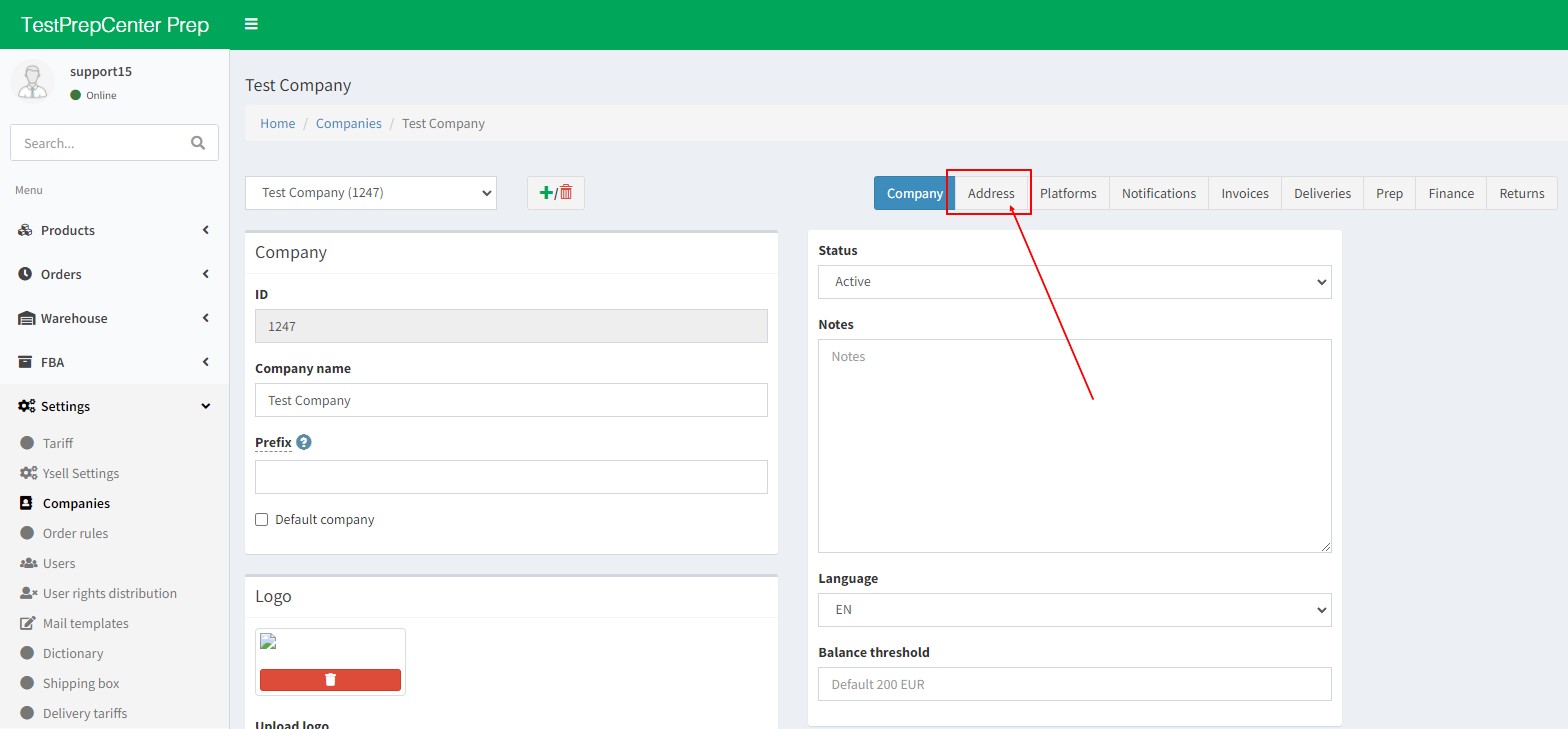
2. System will inform you about creating a new company. All companies get their own IDs. Go to editing information of the company by clicking the Pencil icon. Go to the Address tab.
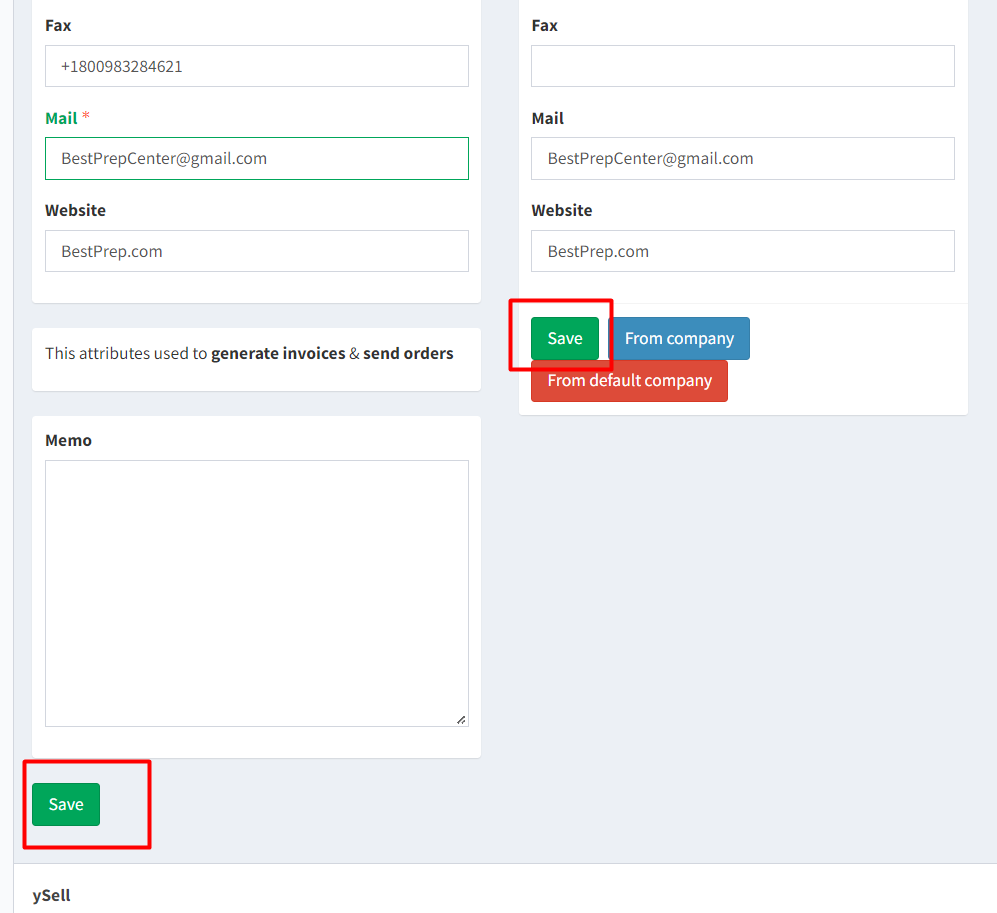
3. Fill the legal address of the company in the Company address fields. Enter the actual address of the company in the Shipping address fields.Save entered information.
Adding stocking places
Put the information about stocking places. Clicking Warehouse in the menu select the Warehouse tab. Click Create warehouse and indicate the information about the warehouse.
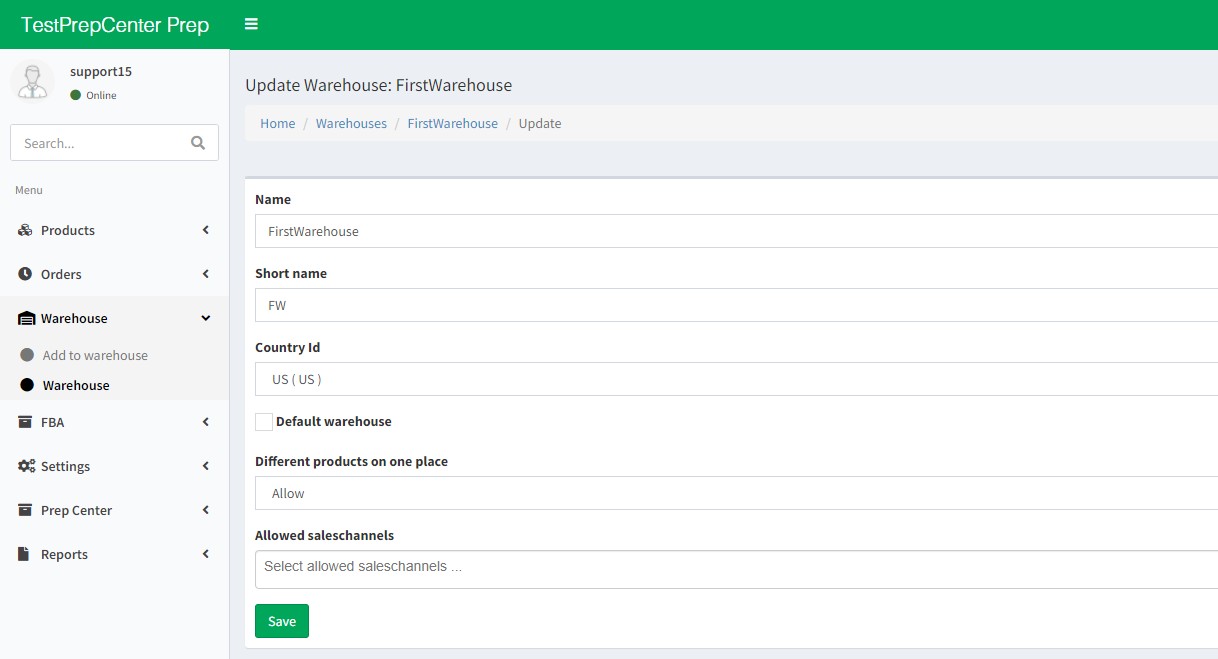
Name - Name of the warehouse.
Short name - Acronym of the warehouse.
Country Id - Country of the warehouse.
Default warehouse - Ticking box for indicating the warehouse as default.
Different products on one place - Indicate Allow for opportunity of stocking different SKUs.
Allowed saleschannels - Available saleschannels for the warehouse. If none was selected then all is available.
Click Save
Move on to adding stockplaces. You can add stockplaces one at a time by clicking Create Storage Place and given amount at a time (Begin - it's the first number, Qty - quantity of storage places that will be created). By clicking the pencil icon go to information editing of the stocking place.
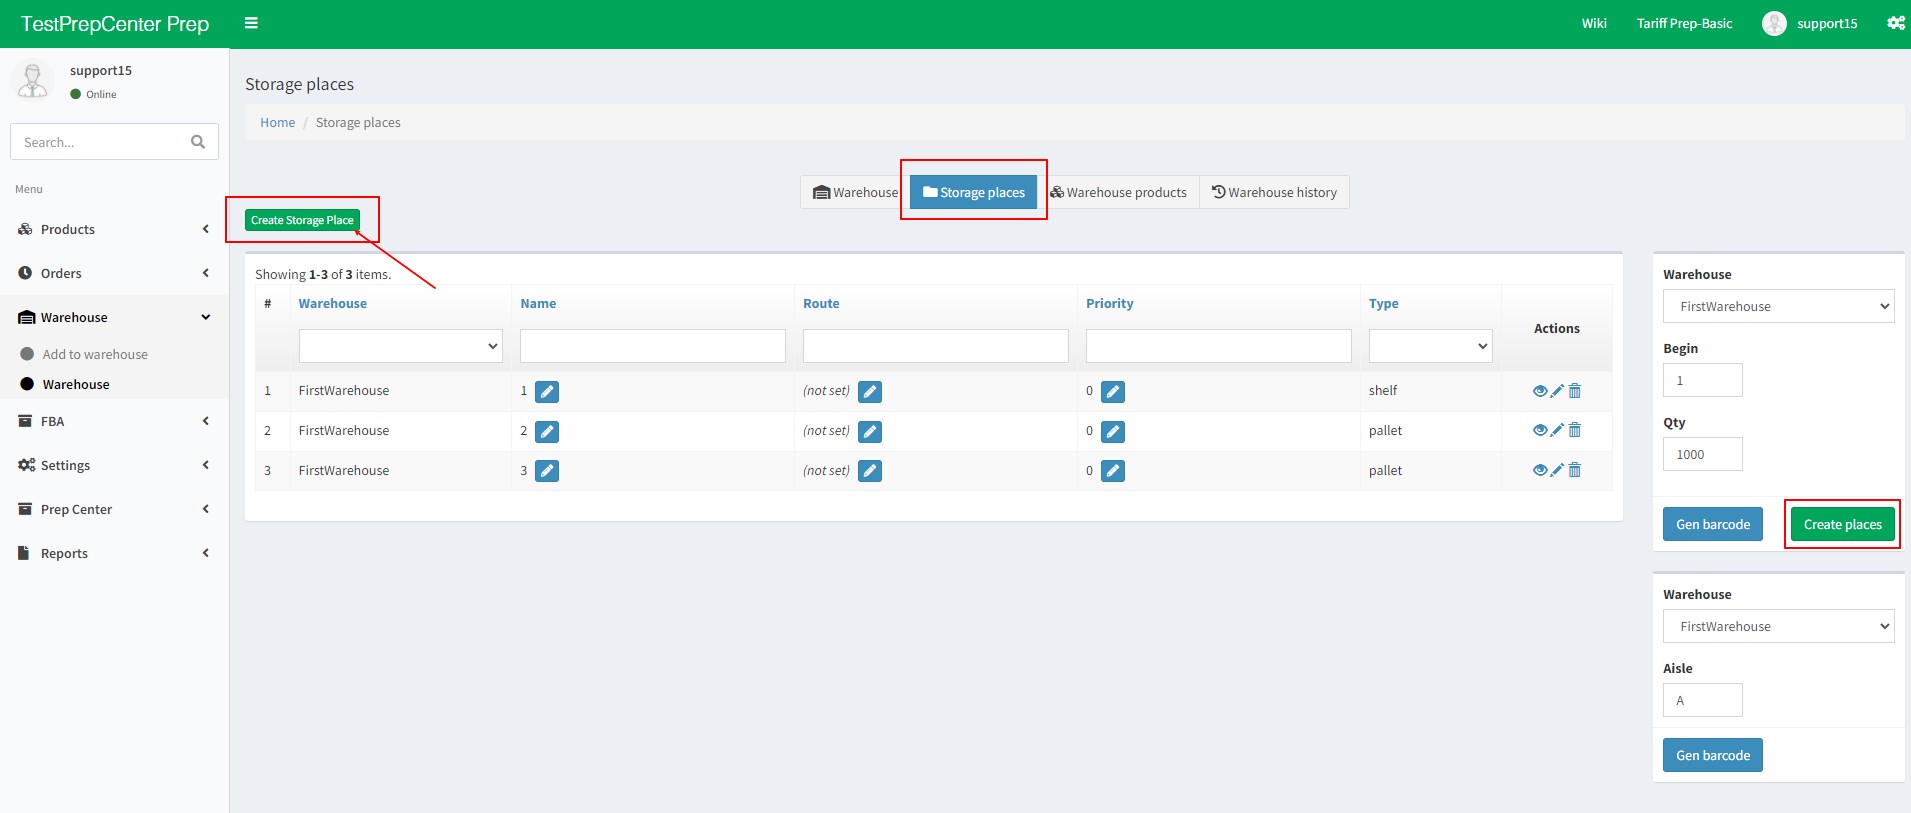
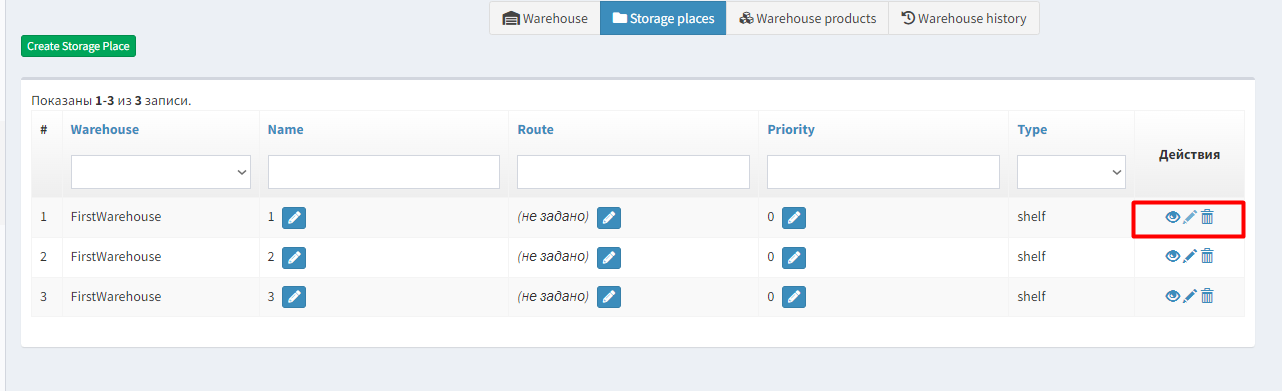
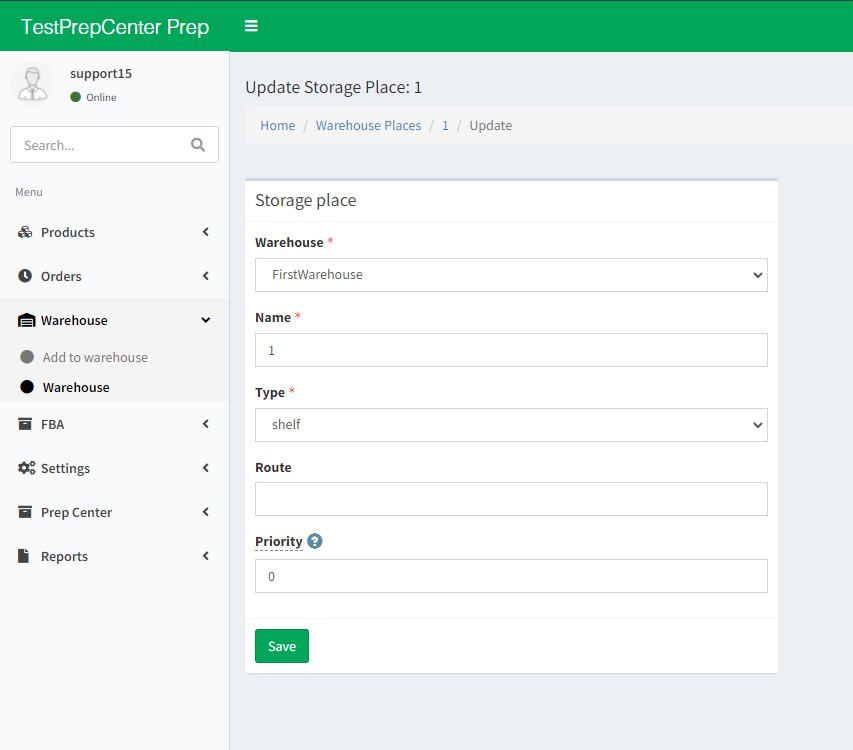
Warehouse - Select one of the previous created warehouses.
Name - Indicate the name of the stocking place.
Type - Type of the stocking place. It may be shelf or pallet.
Route - Route to the stocking place. For instance if specify the priority for shelf with number 2 instead of 5 and for another one specify with number 1 instead of 4, then route will be paved 2-1.
Priority - Specify the priority of the stocking place. If the product is in several stocking places then priority of taking it off will be with the higher priority.
Click Save
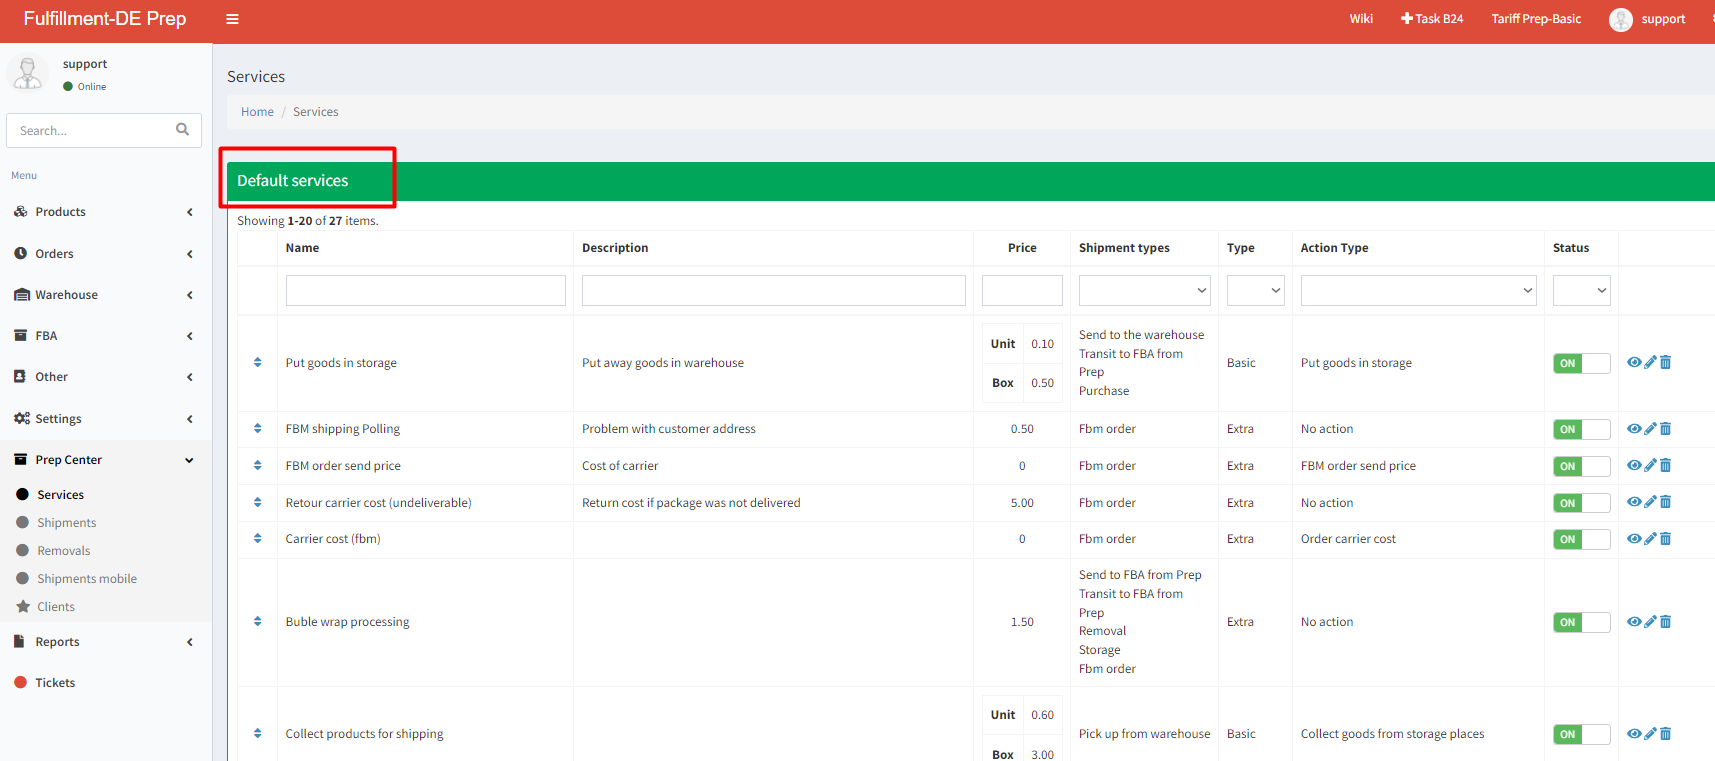
3. Services
Consider list of provided for clients services by the Prep center. Go to Menu - Services, there are list of services provided for clients by the Prep center. For standartisation we suggest default list of services to Prep center in Ysell.
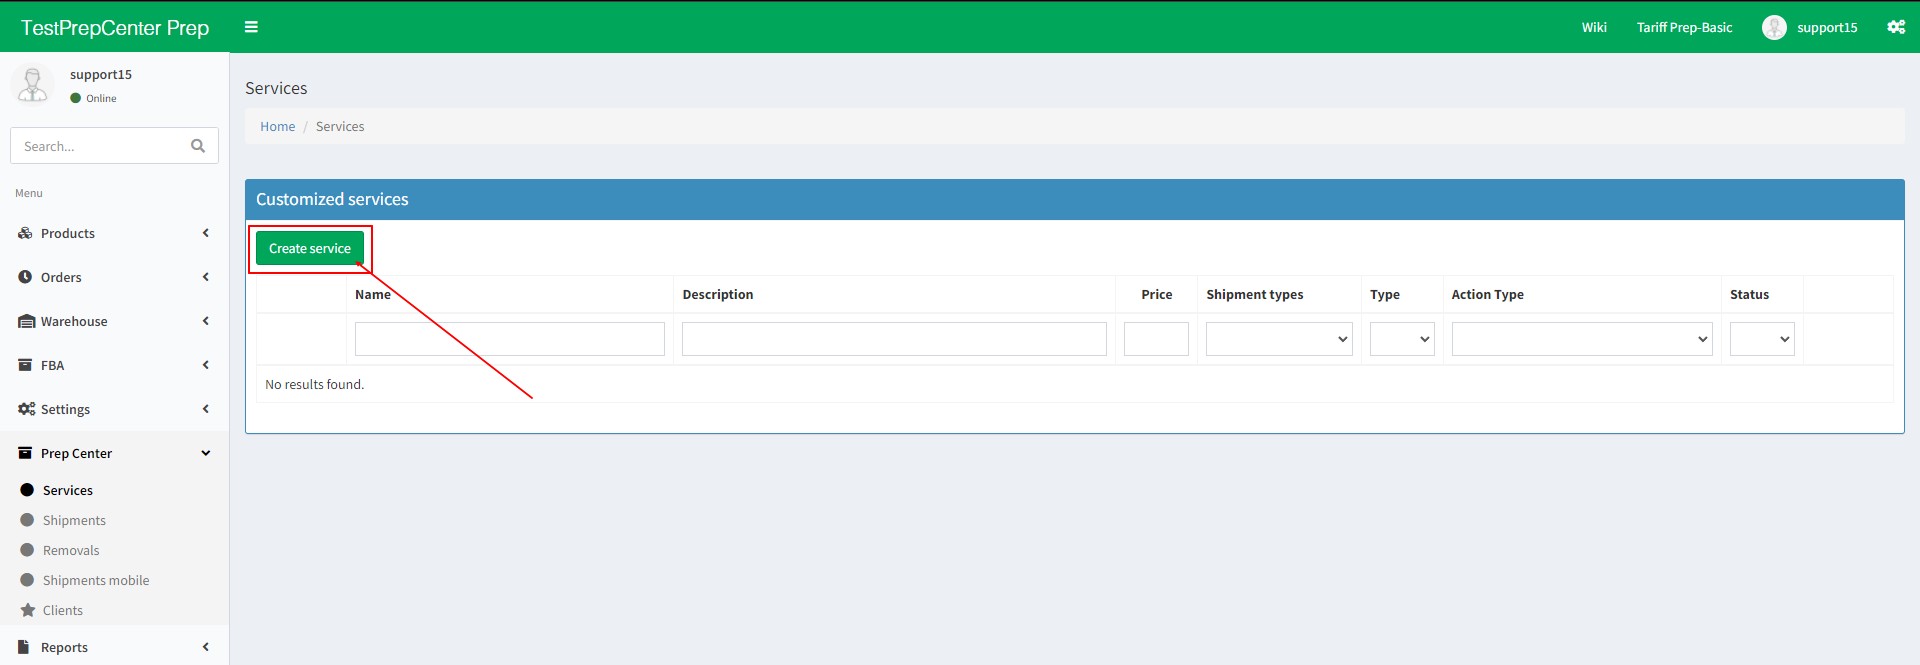
You can add your own services that will be provided to your clients.To create a service click Create Service in the Customized services block.
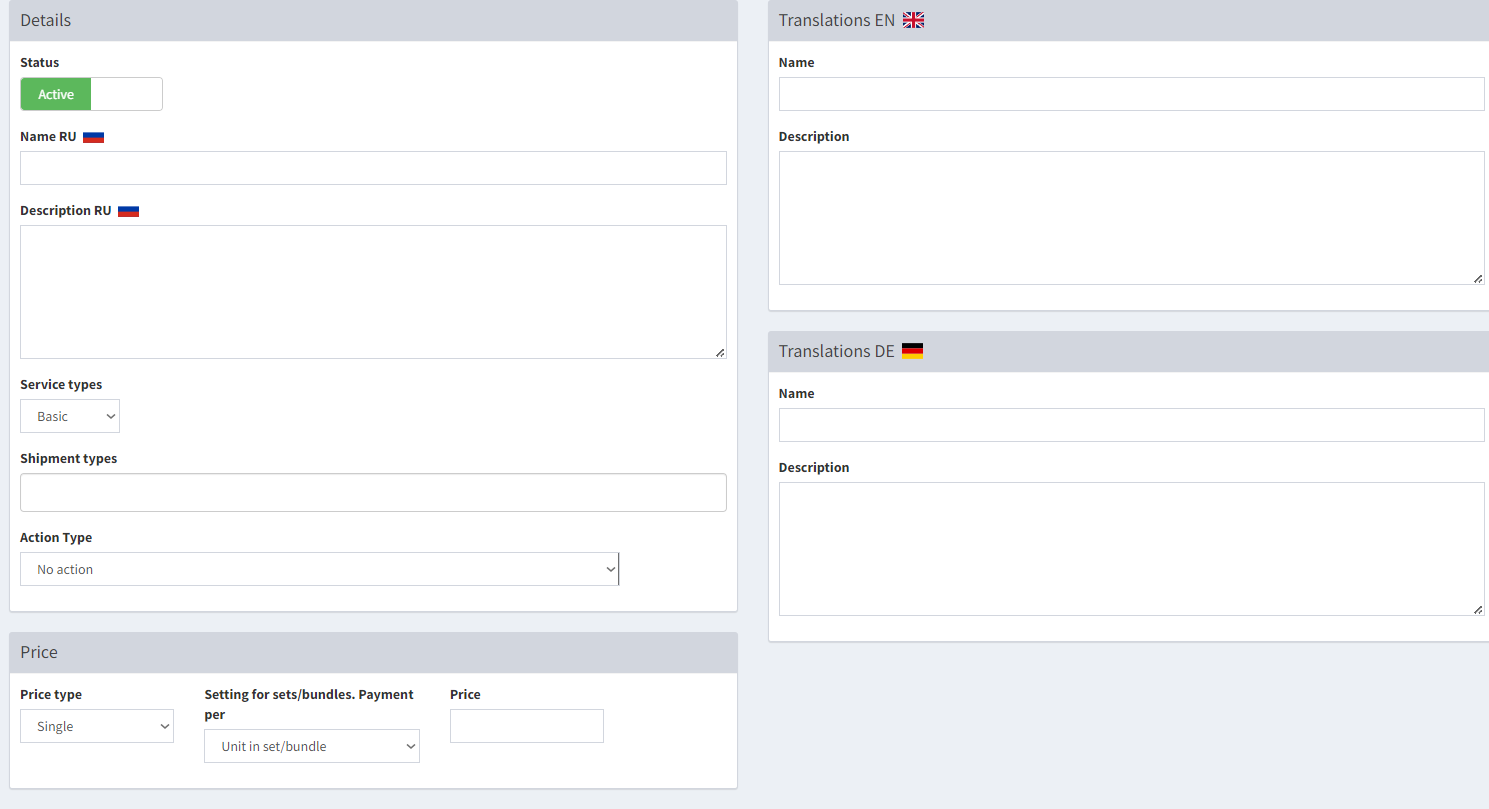
Status - Slider in the status Active shows that the service is active. Inactive means service is inactive.
Name - Specify the name of the service.
Description - Service description.
Shipment types - Types of shipments that the service is applied.
Action Type - Action that applies to the service.
Price - The price for the service indicates in this block. Price type - use single for indicating fixed price. Scale for scaling the price depending on the volume.
Setting for sets/bundles. Payment per - Option is in charge of calculation the price for sets/bundles or units.
Price - The service price. Currancy for calculation invoices sets in the settings of the Prep center
Click Save
Additional information about creation services
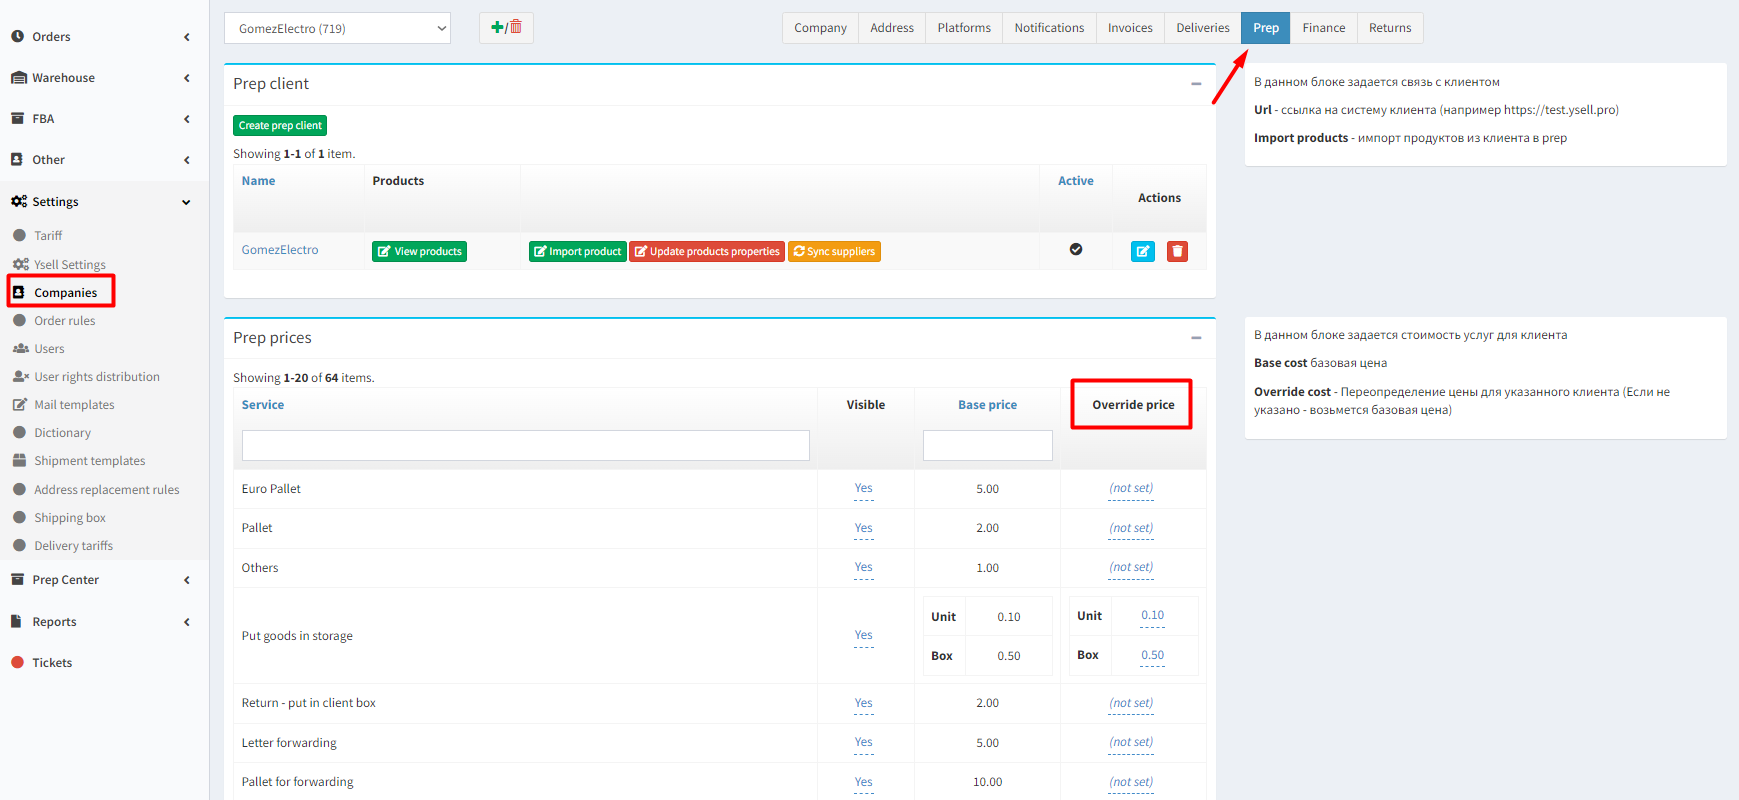
To indicate individual price for the client, go to Settings and select a company of the client and go to the Prep tab. Edit price for the service in the Override Price column.
4. Creating a client account from the Prep center
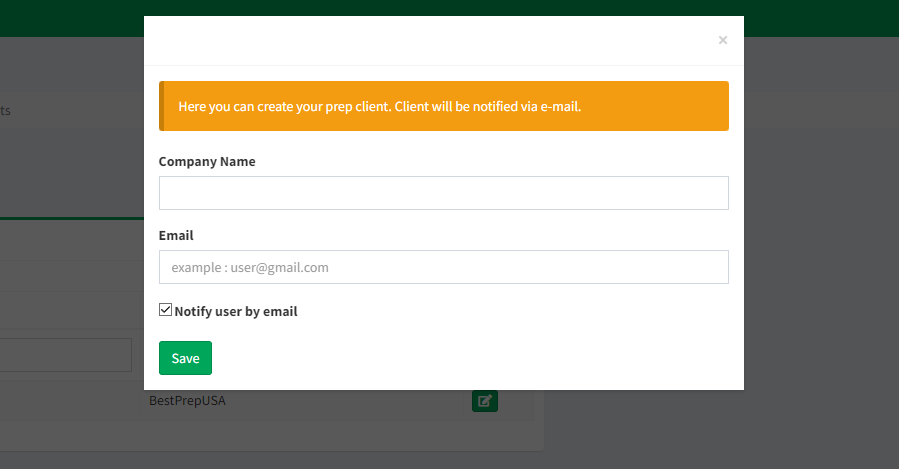
You can create client accounts yourself in the Ysell. Go to Settings-Companies to create a new client account. After clicking the pencil icon select Create new prep client

Enter the email and a name of the company. Ticking the box Notify user by email will notificate the client about creation account by email.
Additional information about creation the client account
5. Connection a client account with the Prep center
To connect an already created client account to the Prep center, go to Settings-Companies. Click +, select Connect prep client and enter the client ID you want to be connected.